concrete crack repair before epoxy coating · 14 min read ·
Concrete Crack Repair Before Epoxy Coating: The Professional Guide to Durable Floors
A flawless epoxy floor is 90% preparation, which means your high-end finish is only as stable as the fractures you've stabilized beneath it. If you've felt the frustration of a DIY repair that shrank or popped out, you u
By Drip Epoxy Flooring · Chilliwack, BC
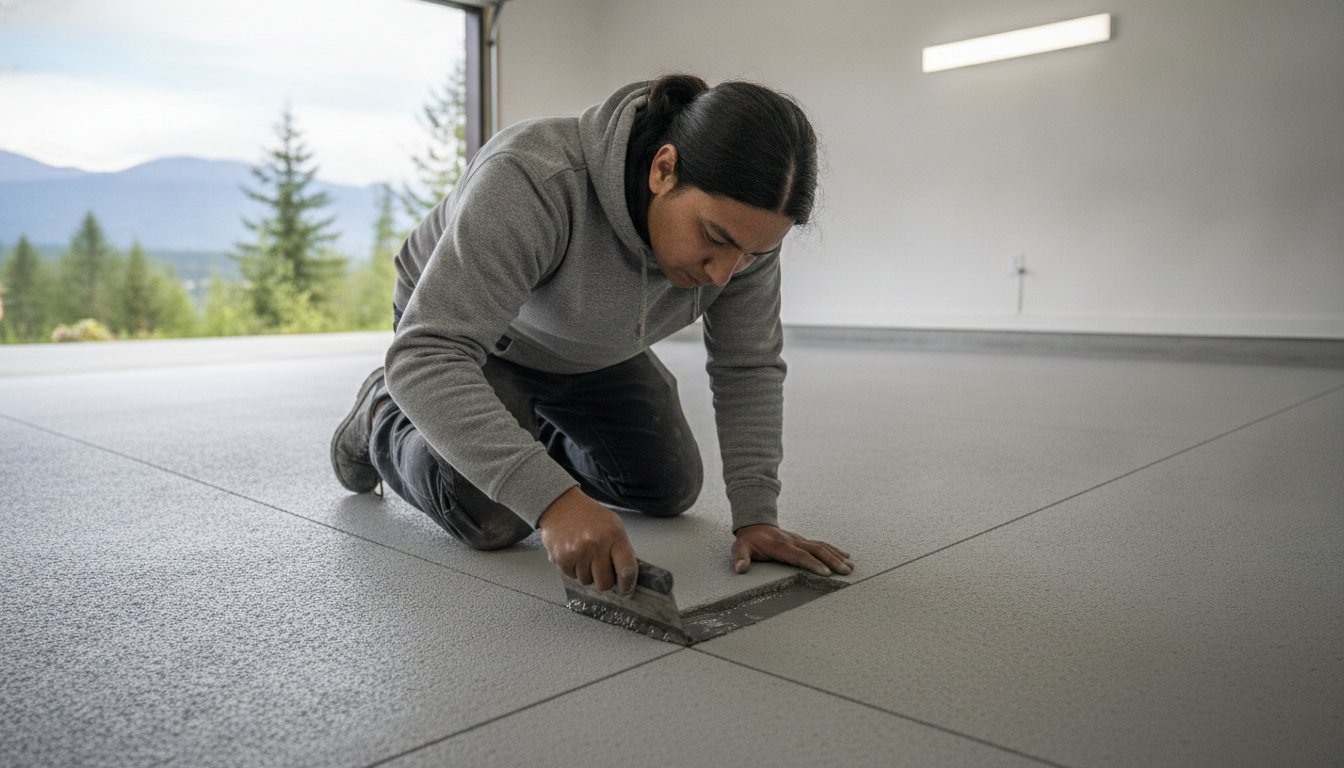
A flawless epoxy floor is 90% preparation, which means your high-end finish is only as stable as the fractures you've stabilized beneath it. If you've felt the frustration of a DIY repair that shrank or popped out, you understand that a simple filler is rarely enough to guarantee a permanent bond. We realize that proper concrete crack repair before epoxy coating is a structural necessity, not just a cosmetic fix. Many property owners fear the moment their premium coating begins to peel or telegraph existing cracks, turning a significant investment into a maintenance headache that compromises both safety and style.
This professional guide details the exact technical steps required to ensure your surface remains seamless and resilient. You'll learn how to select fillers that are chemically compatible with resinous systems and how to execute repairs that won't fail under environmental stress. We'll walk through the essential stages of mechanical diamond grinding, crack chasing, and the application of high-performance stabilizers. By following these industry standards, you can move forward with the confidence that your floor will maintain its glass-like aesthetic and structural integrity for the long term.
Key Takeaways
- Learn how to differentiate between active and dormant cracks to prevent structural movement from telegraphing through your decorative finish.
- Understand why professional-grade mechanical diamond grinding is essential for concrete crack repair before epoxy coating to create a superior mechanical bond.
- Discover how to select the correct repair material by evaluating Shore Hardness and chemical compatibility with metallic or quartz systems.
- Master the technical workflow for stabilizing fractures while navigating the specific moisture challenges of the Lower Mainland.
- Realize the importance of meticulous surface profiling in achieving a seamless, high-performance floor that resists peeling and long-term wear.
Table of Contents
- Understanding Concrete Cracks: Why Surface Preparation Is Non-Negotiable
- The Role of Mechanical Diamond Grinding in Crack Preparation
- Selecting the Right Filler: Rigid Epoxy vs. Flexible Polyurea
- How to Repair Concrete Cracks Before Epoxy Coating: A Step-by-Step Guide
- Achieving a Flawless Finish: The Drip Epoxy Standard for BC Homes
Understanding Concrete Cracks: Why Surface Preparation Is Non-Negotiable
Concrete is far more dynamic than its rigid appearance suggests. It's a porous, shifting material that breathes and moves in response to environmental changes. Many property owners mistakenly believe that a thick, high-performance coating will naturally bridge existing gaps. However, Epoxy resins are engineered to bond to a stable substrate rather than act as a structural bridge for a shifting slab. If you don't prioritize meticulous concrete crack repair before epoxy coating, the underlying movement will eventually cause the finish to snap or delaminate. This leads to a phenomenon known as ghosting, where the original fracture telegraphs through the finished floor, creating a visible, unsightly line that ruins a premium aesthetic.
Properly assessing the severity of these imperfections is the first step in a professional restoration. We categorize cracks into three primary types:
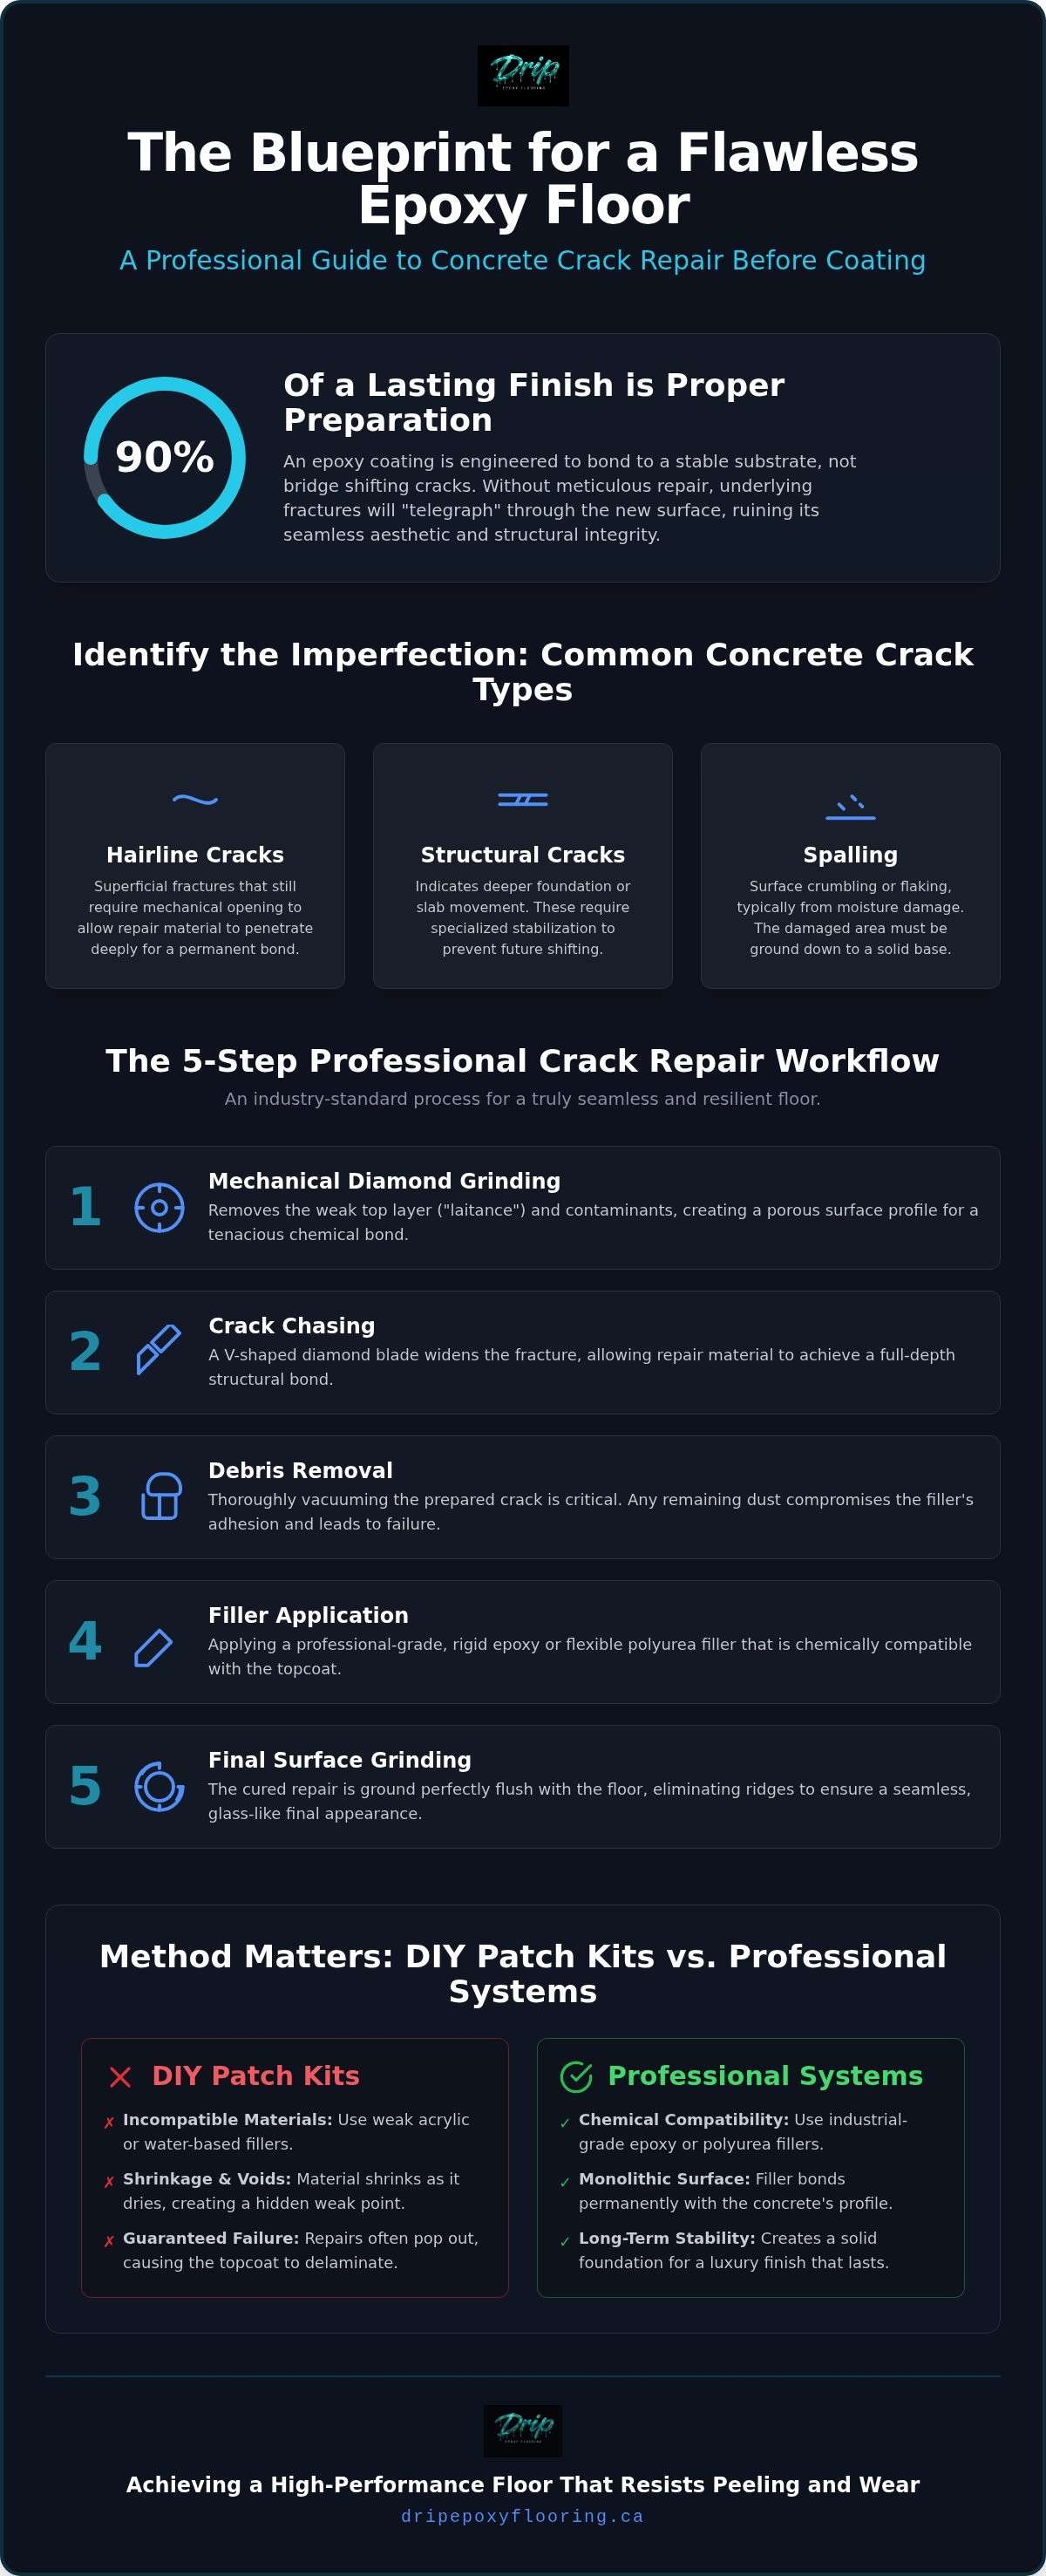
- Hairline Cracks: These are often superficial but still require mechanical opening to ensure the repair material can penetrate deeply.
- Structural Cracks: These indicate deeper movement in the foundation or slab and require specialized stabilization to prevent future shifting.
- Spalling: This occurs when the surface of the concrete begins to crumble or flake away, usually due to moisture or poor original finishing.
The Difference Between Shrinkage and Settlement
In British Columbia, new concrete pours frequently develop hairline fractures as moisture evaporates during the curing process. These shrinkage cracks are generally dormant and stable once the concrete has reached full maturity. Conversely, settlement cracks are caused by the shifting geography of the Fraser Valley or the intense freeze-thaw cycles common in our climate. These are active cracks that expand and contract. Without professional intervention, an active crack will continue to move, eventually overpowering the tensile strength of the epoxy and causing a failure in the coating.
Why DIY Patch Kits Frequently Fail
Most consumer-grade patch kits utilize acrylic or water-based fillers that are fundamentally incompatible with industrial-grade resinous systems. These materials often shrink significantly as they dry, pulling away from the concrete walls and leaving a hidden void. When a professional coating is applied over these weak points, the bond is compromised from the start. Utilizing professional concrete floor preparation services ensures that the repair materials match the chemical profile of the final system. This creates a monolithic surface that won't pop out or shrink, providing the industrial luxury finish our clients expect.
The Role of Mechanical Diamond Grinding in Crack Preparation
Mechanical diamond grinding is the gold standard for professional surface preparation. While DIY methods often rely on acid etching or simple wire brushing, these techniques fail to address the underlying issues within the concrete. Acid etching is frequently inconsistent and introduces unnecessary moisture into the slab, which can lead to future delamination. Wire brushes merely polish the surface of the crack without removing deep-seated contaminants. In contrast, industrial grinding removes the top layer of "laitance" and exposes the open pores of the concrete. This creates a specific surface profile that is essential for a high-performance chemical bond. Grinding also strips away old sealers, oil stains, and paint that often hide within the crack walls, which are common points of failure for unrefined repairs.
Chasing Cracks with Diamond Blades
Professional installers use a technique called "crack chasing" to prepare the slab for restoration. This involves using a specialized V-shaped diamond blade to widen the fracture slightly. While it may seem counterintuitive to make a crack larger, this process is vital for successful concrete crack repair before epoxy coating. Opening the crack allows the repair material to penetrate all the way to the bottom, ensuring a full-depth bond rather than a superficial cap. According to the ACI structural crack repair guide, proper cleaning and widening are fundamental to restoring the structural integrity of the slab. We also ensure the shoulders of the crack are ground level with the surrounding floor, preventing any unsightly humps or ridges from appearing in your final premium floor finish.
Dust Containment and Surface Cleanliness
The grinding process generates a significant amount of fine silica dust that can compromise the entire project. If this dust is left behind, it acts as a bond-breaker, leading to localized peeling and failure. We utilize industrial-grade HEPA-filtered vacuums connected directly to our grinders to capture nearly all airborne particles. This keeps your property clean and ensures that the concrete pores remain open and receptive to the filler. Every inch of the floor is vacuumed and inspected multiple times before we begin the application. This meticulous approach to cleanliness is what separates a standard garage floor from a high-end, industrial luxury transformation. Removing every microscopic layer of dust is the only way to guarantee the longevity of the system.
Selecting the Right Filler: Rigid Epoxy vs. Flexible Polyurea
Choosing the correct material for concrete crack repair before epoxy coating is a decision that dictates the long-term success of the installation. It's not merely about filling a void; it's about matching the physical properties of the repair material to the specific flooring system. One critical metric we evaluate is Shore Hardness, which measures a material's resistance to permanent indentation. If a filler is too soft, it will eventually sink or "telegraph" through the topcoat; if it's too rigid in an area prone to movement, it may snap. Chemical compatibility is equally vital to prevent outgassing, where trapped air or gases escape during the curing process, creating unsightly bubbles in your pristine finish. In the Lower Mainland, our high humidity levels can significantly alter cure times, making the selection of climate-resilient resins essential for a predictable, high-quality result.
Rigid Epoxy Fillers for Seamless Finishes
High-modulus rigid epoxy fillers are the preferred choice for structural stabilization and static cracks. These materials bond tenaciously to the concrete walls, effectively turning two pieces of a slab back into one. We prioritize these fillers in high-traffic commercial environments where the floor must withstand heavy loads without shifting. This approach is particularly crucial for Metallic Epoxy Flooring, where a glass-like, mirror finish is required. Any movement in the crack would immediately ruin the flowing, artistic effects of the metallic pigments; therefore, a rigid, unmoving foundation is the only acceptable standard for luxury applications.
Polyurea and Flexible Fillers for Joint Movement
Not every gap in a concrete floor should be filled with a rigid material. Control joints and expansion cracks are designed to accommodate the natural movement of the building. For these areas, we utilize polyurea or flexible fillers that can stretch and compress without losing their bond. One major advantage of these systems is their rapid cure time; many polyurea fillers can be ground flush just 30 minutes after application, keeping the project on a tight, professional schedule. By using a flexible medium in moving joints, we prevent reflective cracking, where the topcoat mirrors the movement of the slab below. This ensures your decorative flake or solid colour system remains intact even as the seasons change in the Fraser Valley.
How to Repair Concrete Cracks Before Epoxy Coating: A Step-by-Step Guide
Achieving a glass-like floor finish requires a methodical workflow that prioritizes structural stability over speed. In the Lower Mainland, managing moisture is the most significant challenge. "Dry" concrete is often a relative term in our climate; high water tables and humidity mean that cracks often act as chimneys for moisture vapour transmission. If this vapour is trapped beneath a non-breathable coating, it can lead to osmotic blistering. Professional concrete crack repair before epoxy coating involves testing for these moisture levels and ensuring the slab is prepared to receive a permanent bond. We utilize a precise "overfill and grind" technique, which involves applying an excess of repair resin and then grinding it perfectly flush to ensure no dips or ridges remain in the final surface.
Step 1: Mechanical Cleaning and Profiling
The process begins with industrial diamond grinders to remove the "laitance" layer, which is the weak, milky top layer of concrete that forms during the original pour. This step is vital for opening the pores of the slab. We pay special attention to the interior walls of each fracture, ensuring they are free of loose debris, old paint, and hidden moisture. If the concrete is exceptionally porous or "soft," we apply a specialized penetrating primer to consolidate the surface before the repair material is introduced. This creates a high-strength foundation that prevents the filler from being absorbed too deeply into the surrounding slab.
Step 2: Injecting and Packing the Filler
Precision is mandatory when mixing two-part repair resins. We use exact mixing ratios to ensure the chemical reaction reaches full peak exotherm, providing maximum strength. For deep structural fractures, we employ sand-casting or backer rods to provide support and prevent the resin from draining into the sub-base. It's essential to work within the "pot life" of the industrial resin, as applying material that has already begun to gel will result in a weak bond. We pack the filler tightly into the void, ensuring no air pockets remain trapped beneath the surface, as these can expand and cause pinholes in your topcoat.
Step 3: Leveling and Final Surface Prep
Once the filler has fully cured, we grind the excess material flush with the surrounding slab using fine-grit diamond pads. This stage requires a meticulous eye to inspect for any minor pinholes or slight shrinkage that may require a second pass. A final solvent wipe is performed to remove any lingering oils or microscopic dust, ensuring a pristine surface for the application of high-end garage floor coatings. This level of detail ensures the repair is invisible once the decorative system is applied. To ensure your project begins with this level of precision, request a professional site assessment and quote from our expert team.
Achieving a Flawless Finish: The Drip Epoxy Standard for BC Homes
Drip Epoxy Flooring views crack repair as the foundational pillar of any successful floor transformation. We don't just "patch" floors; we restore the slab to a monolithic state. This meticulous process ensures that the final decorative system remains unblemished by the structural movement or environmental stresses common in the Fraser Valley. Professional concrete crack repair before epoxy coating is what separates a temporary cosmetic fix from a lifetime surface. By integrating structural stabilization with high-end aesthetics, we provide a floor that maintains its integrity and beauty for decades. Our methodical approach prevents the common "pop-outs" and peeling associated with inferior preparation, offering a sense of security that only comes from technical expertise.
Serving the entire Lower Mainland, from the residential neighbourhoods of Langley to the industrial centres of Chilliwack, we understand the local geography. The seismic activity and temperature fluctuations in British Columbia require a repair strategy that is both rigid and resilient. A professionally restored slab provides a seamless, glass-like finish that is as easy to maintain as it is beautiful. Because the cracks are stabilized at a sub-surface level, you won't have to worry about dirt accumulation or moisture penetration through the fractures.
Industrial Luxury for Residential Spaces
We bring industrial-grade precision to every residential project. Whether you are looking for a Decorative Flake System or a high-gloss metallic finish, we treat your garage floor with the same meticulousness as a heavy-duty manufacturing plant. This commitment to "industrial luxury" means your floor will withstand vehicle traffic, chemical spills, and heavy equipment without failing. Our stabilization process is backed by the confidence of craftsmen who understand the science of concrete movement. We customize every resin profile to match the specific needs of your slab, ensuring a perfect bond every time.
Ready to Transform Your Concrete?
If you're located in Abbotsford or Surrey, our team is ready to provide a comprehensive on-site consultation. This includes professional moisture testing and a detailed slab assessment to identify active fractures that require specialized attention. We believe in transparency and will walk you through the exact steps needed to prepare your floor for a premium coating. You can expect a thorough evaluation that considers the unique climate challenges of the BC coast. Contact Drip Epoxy Flooring to start your floor restoration today and experience the difference of a professionally prepared, high-performance surface.
Investing in Structural Integrity for an Impeccable Finish
Ensuring your floor remains a seamless masterpiece requires moving beyond superficial fixes. By prioritizing technical precision and structural stabilization, you protect your property from the peeling and delamination that plague inferior installations. We've explored how mechanical diamond grinding and the selection of chemically compatible fillers create a monolithic bond. This specialized approach to concrete crack repair before epoxy coating ensures that your high-end metallic or flake system remains flawless despite the shifting climate of the Lower Mainland. As specialists in mechanical preparation, we utilize industrial-grade materials to deliver residential luxury that lasts for decades.
Our team serves the entire Fraser Valley, providing on-site moisture testing and meticulous craftsmanship to every project. Whether you're in Chilliwack or Langley, a professionally restored slab is the only way to guarantee a glass-like finish that won't fail over time. Request a Free Quote for Professional Concrete Preparation and Coating to begin your floor transformation. We look forward to helping you realize the full potential of your space with a floor engineered for permanence.
Frequently Asked Questions
Can I just use concrete caulk to fill cracks before epoxy?
Standard concrete caulk is too soft and will fail under resin. It's designed for expansion and remains pliable, which prevents the epoxy from forming a permanent bond. If you use caulk, the coating will likely peel or sink into the joint because it can't adhere to the flexible surface. Professional concrete crack repair before epoxy coating requires industrial resins that match the hardness of the slab and can be ground perfectly flush.
Will the cracks in my garage floor come back after being coated?
Cracks only reappear if the underlying movement isn't addressed or if the repair material lacks the necessary tensile strength. By utilizing mechanical diamond grinding to open the fracture and filling it with high-modulus resin, we stabilize the area effectively. This prevents "reflective cracking," where the original line telegraphs through your new metallic or flake finish. Proper preparation ensures the repair remains invisible for the life of your floor.
How long do I have to wait for the crack filler to dry before applying epoxy?
Cure times vary significantly based on the chemistry of the filler and the ambient temperature in cities like Abbotsford or Langley. Rapid-cure polyurea fillers can often be ground flush in as little as 30 to 45 minutes. Traditional epoxy fillers may require 12 to 24 hours to reach full hardness. We always verify the moisture levels and temperature before proceeding to ensure the filler has chemically stabilized before the base coat is applied.
Do I need to fix hairline cracks if I am using a thick flake system?
Yes, hairline cracks must be repaired even under thick decorative flake systems. While the flakes provide some hide, air trapped within an unrepaired crack can expand as the floor warms, leading to "outgassing" bubbles in your topcoat. Additionally, the crack will continue to move slightly with temperature changes. This can eventually cause a visible fracture or delamination in the coating above it, ruining the industrial luxury finish.
What is crack chasing and is it really necessary for my floor?
Crack chasing is the process of using a diamond blade to widen a fracture into a clean, V-shaped groove. It's absolutely necessary because it removes brittle edges and deep-seated contaminants that prevent a strong bond. By widening the crack, we ensure the repair resin penetrates the full depth of the fracture rather than just sitting on the surface. This mechanical step is vital for the long-term structural stability of the floor.
Does the BC climate affect how concrete cracks are repaired?
The Fraser Valley's damp climate and freeze-thaw cycles significantly impact repair strategies. High moisture vapour transmission in regions like Chilliwack and Mission means we must use moisture-tolerant resins and ensure the slab is sufficiently dry. If moisture is trapped within a crack during repair, it can lead to osmotic blistering. We adjust our material selection and cure times to account for local humidity and temperature fluctuations throughout the year.
Can epoxy coating fix structural cracks in my foundation?
Epoxy coatings are high-performance surface finishes, not structural foundation repairs. While we can stabilize surface fractures and prevent them from telegraphing, a coating won't stop a foundation from sinking or shifting if there are major underlying issues. If a crack is wider than a quarter-inch or shows significant vertical displacement, it's best to consult a structural engineer before proceeding with any decorative resinous flooring system in your home or business.
Is it better to use a rigid or a flexible filler for garage floor cracks?
The choice depends on the type of crack. Static cracks that have finished moving are best served by rigid, high-strength epoxy fillers that restore the slab's integrity. However, control joints and expansion cracks require semi-rigid polyurea fillers. These allow the concrete to move naturally without snapping the coating. Understanding this distinction is a hallmark of professional concrete crack repair before epoxy coating, ensuring the floor remains durable and aesthetically pleasing.